
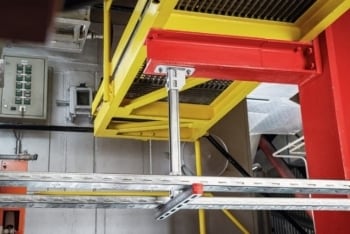
Hilti solutions for fastening on steel
In our previous article, that can be found here, we looked at the application of fixing elements to steel, the challenges linked to the traditional methods of fixing and Hilti’s solutions to answer those challenges.
In this article we will focus on the static design of Hilti’s studs for fastening on steel, with a design example solved through a “hand calculation”.
Design example of a bracket with a point load
This example has the following conditions (see Figure 1):
- Steel profile bracket with 600 mm of span;
- 1.5 kN load on the extremity (live load);
- Base material is an IPE 270 coated steel profile;
- Fixing of the bracket to the steel profile with 2 headed studs.


Figure 1 - Design example - bracket with a point load on the extremity. 3D view (left) and 2D view (right).
Regarding the design of the studs, the first step would be to calculate the design loads and the reactions on the connection between the bracket and the steel profile (see Figure 2). Regarding the calculation of the design loads, we apply the partial safety design concept, according to the Eurocode.

Figure 2 - Reactions in the connection between the bracket and the steel structure.
After checking the reactions, we will proceed with the design assuming the F-BT stud, since we are dealing with an application with high reactions. The stud assumed is the M10 for coated steel applications: F-BT-MR M10x50 SN (10). Regarding the nomenclature of the stud, it follows the logic shown in Figure 3.

Figure 3 - Naming logic for the F-BT studs.
So, the stud pre-selected for this example has 10 mm diameter, 50 mm length, it’s applied with a steel and neoprene washer for corrosion protection and the base material should have a minimum thickness of 10 mm. The IPE 270 profile has a flange thickness of 10.2 mm, so we can proceed. In case the base material had a thickness lower than 10 mm (for the M10 stud), a load reduction factor should be applied to the resistance of the stud, according to the Technical Manual.
After getting the reactions, we should distribute the load through the two studs. For this we are assuming the following:
- The bending moment is split into a tension-compression binary. Therefore, the upper stud will be tensioned, and the lower stud will be under a compression force. Regarding the lever arm for bending, we will conservatively consider the distance between the center of the studs. For F-BT, in the case of a connection of 2 studs (like this example) a support plate needs to be installed on top of the sealing washers to increase the resistance perpendicular to the shear load direction. Because of this support plates, the compression force is not relevant in this case but please note that, for an example of 4 studs, the sealing washers should also be verified for compression;
- When we have more than one stud (group behaviour), the distribution of the shear load is affected by stud ductility and actual clearance. Therefore, to cover an unfavourable position of studs in rows, one stud of the row is considered for the total shear load of the entire row. In this case, Hilti’s installation channel has oval holes – see Figure 4. So, the upper hole has a vertical orientation, making the lower stud bear all the shear and preventing the upper stud from getting both tension and shear. If it were to be that the channel was installed in the opposite direction (vertical hole on the bottom), then please note that the upper stud would take all the shear and tension, not optimising the design. Also note that, in the case of circular holes, the distribution of the shear on group fastenings might not be the same for all studs. Therefore, if this was the case, the shear resistance of the studs should’ve been affected by a parameter – α reduction factor, which depends on the type of the stud and the number of studs in the connection, this would be given in the Technical Manual and/or the ETA of the products.

Figure 4 - Oval holes orientation and impact on the shear load.
For the upper stud we have:
And for the lower stud we have: 
After having the loads per stud we should compare it to the published resistances. We can see in Table 1 below that the F-BT stud with 10 mm of diameter has a tension resistance of 11,2 KN and a shear resistance of 5 KN.

Table 1 - Design resistances of the F-BT studs based on the partial factor method.
Therefore, we should proceed with the design verification. For that, we should compare the acting tension and shear independently and, after that, the interaction between the two types of loads. The tension-shear interaction factor (in this case is 1.2) is given in the Technical Manual and depends on the technology (X-BT, S-BT and F-BT).
For the upper stud:

For the lower stud:

As shown above, both upper and lower stud are suitable for design, since all the requirements were respected. Please note that for the other fastening on steel stud solutions (S-BT HL and X-BT), the design procedure would be similar, with the exceptions already mentioned.
Available to support you – Design Tables (Typicals)
In the previous part of the article we did a “hand” calculation example, however, we provide you with design tables for a faster design of the studs. This design tables cover standard Fastening on Steel cases, which we call “Typicals”. These cases are shown in Figure 5.


Figure 5 - Standard cases covered by the Design Tables (Typicals).
There are some assumptions of the design tables that are relevant to reference, namely:
- For the load distribution on the studs, it is assumed the worst-case scenario, which means that the shear loads are assumed to be carried only by the top threaded stud(s) which also carry the tensile load (in the “hand” calculation example we had a different assumption);
- No loads in axis of cable trays or pipe due to thermal expansion or other phenomena are considered.
Based on that, you can download a file for the design of F-BT and a file for the design of both S-BT HL and X-BT here.
In the tables we can identify different parameters, namely the dimension of the lever arm of the load (L1), the distance between fasteners (x) and the acting load (F, that includes both self-weight and the additional load). These parameters are shown in Figure 6.


Figure 6 - Parameters of the design tables.
The design tables are displayed for situations with 2 or 4 studs and can be read in different ways, depending on what is the unknown parameter. In this case we will do the same example as before (bracket fixed with two studs with a point load on the extremity) for a different stud (S-BT MR HL) in two different scenarios:
- Scenario 1: what is the maximum load for a 600 mm bracket?
- Scenario 2: what is the maximum length of the bracket for a 150 kg load?
For scenario 1, the design example is shown in Figure 7. In the columns we have the length of the brackets (in this case 600 mm) and on the rows the distance between studs. In the example we had 122 mm of distance, in this case we analysed for 125 mm, which is the closest value. For this situation, the maximum load to be applied is 75 Kg.

Figure 7 - Design example with design tables - scenario 1.
For scenario 2, the design example is shown in Figure 8. In the columns we have the load and on the rows we have distance between the studs. Here we can see that for a load of 150 kg, the maximum length of the bracket would be 250 mm.

Figure 8 - Design example with design tables - scenario 2.
References
[1] EN 1990:2002: Eurocode – Basis of Structural design, European Standard, December 2008
[2] Hilti, Hilti Cordless Stud Fusion Technical Manual, Version 05/2023
[3] Deutsches Institut fuer Bautechnik, European Technical Assessment ETA-20/1042, issued April 2021
[4] Deutsches Institut fuer Bautechnik, European Technical Assessment ETA-23/0001, issued February 2023